Strict Version Control
![]()
Version control is used for documents that are being edited by a group. It helps ensure that only one member of a group is editing a document at any one time. If more than one group member is editing a document at the same time, the work of one of the members will be lost.
We call it strict version control, due to the strict rules that we apply when checking in and checking out documents. The rules applied in our version control mean that there is less of a chance that valuable work will be lost.
WARNING: Strict Version Control will not keep you from losing valuable work if you do not use good document handling procedures. Make sure that you only edit the document that you check out, and make sure that you only check in the document that you edited.
Checking in/out
When you are using version control, you will notice that the icons have changed, and when you hold the pointer over one of the icons you'll see that the link labels have changed. Instead of 'Download latest file' the link is called 'Check Out'. Check Out is almost identical to 'Download latest file', except that 'Check Out' doesn't allow anyone else to Check Out the document until you Check In the document.
NOTE: When you Check Out a document, you will be asked to either Save or Open the file. We recommend that you save the file to a location that is easy to find. You will need to be able to find it again, when you check in the file. However, if you choose Cancel, please remember to click the 'Cancel Check Out' icon, so that other team members can edit the document.
When you have finished making changes to the document, save it and close the program that you are using to make edits. You are now ready to Check In the document. You now will need to click the icon called 'Check In' and navigate to where you saved the document.
Setting Strict Version Control
![]()
To set Strict Version Control...
Checking in and Checking out
Once you have set 'Strict Version Control' for a file, you will need to check out the file when you want to make changes to the file.
To Check Out a file...
Your document has been checked in!
Cancel Checkout
If you haven't made any changes to the document, or if you wish to discard
the changes, you can choose to 'Cancel Checkout'. Clicking the Cancel Checkout (
![]() ) icon will open the document to editing by other members of your team.
) icon will open the document to editing by other members of your team.
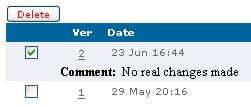
Update History
To find out the update history of a particular file, click the date next to the checkbox. The a separate file history window will appear, with the checkin/out history, including the name of the user, as well as the time and date of the checkin/out.
![]()
Another a way to see the Update History is to select the file's checkbox and click settings.
At the top of the settings window, update information like the following will appear:
Notices
Depending on your settings, when a new version of a file has been checked in, a notice will be generated and sent to all users that you have specified for receiving update notices for the file.
![]()