| Photo Album
|
|
|
|
Welcome to the latest version of the Safe-mail Photo Album, which provides a powerful, easy-to-use way to store, print, and share your photos - in a totally secure environment.
NOTE: Since we are still working hard to bring you new features, we consider this version of the Photo Album to be a beta, or trial version.
WHAT'S NEW
The Safe-mail Photo Album now allows you to organize your digital photos in the same way that you would organize your printed photos:
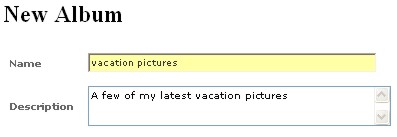
Albums - Safe-mail Photo Album allows you to create as many albums as you want - with their own names and descriptions.
Pages - Safe-mail Photo Albums contain pages. Each page can extend over several screens and includes a name and a description.
Photos - Individual photos are stored within album pages. Each photo can be given a name and a description.
NOTE: You can give each album its own, unique list of permitted users.
We hope that you enjoy this new addition to Safe-mail!
When you access your Safe-mail Photo Album for the first time, you will be given a description of what's new for the current version of the Safe-mail Photo Album.
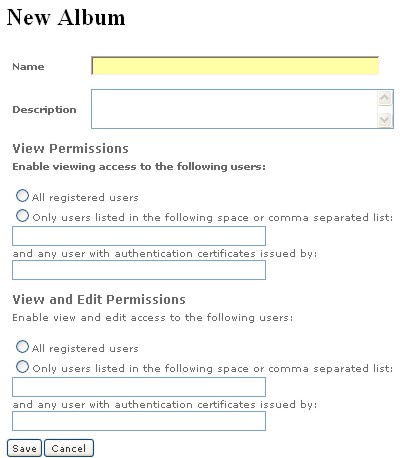
To create a new album...
The following window appears:
NOTE: The description will appear in the modern interface, when the pointer hovers over the album. In the traditional interface, the viewer needs to select an album and click 'Album Details' to see the Description.
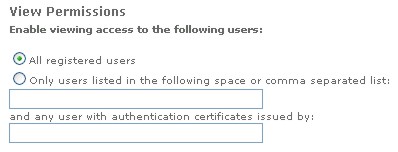
- All registered users - Any Safe-mail user will be able to view your photo album.
- Only users listed... - Those Safe-mail users that have been added to the first text box. They will the only users able to view the album.
NOTE: If you wish to allow specific users the ability to make changes to your album, it is not necessary to add the same user under 'View Permissions', if the user also appears in 'View and Edit Permissions'.
- All registered users - Any Safe-mail user will be able to view and change your photo album.
- Only users listed... - Those Safe-mail users that have been added to the first text box. They will be the only users able to view the album.
NOTE: If a user appears in 'View and Edit Permissions', it is not necessary to add the user to 'View Permissions'.
Adding a New Page to the Photo Album...
To add another page to the album...
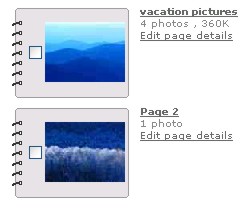
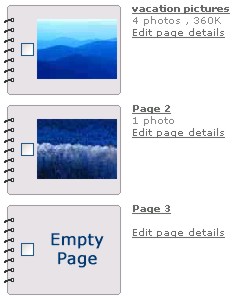
You will return to the Album page list, which will now include the new, empty page.
You are now ready to open the page and begin adding photos.
Adding photos to your album...
After you have created your new album, you need to add photos to your album. If you are not ready to add photos to your album, you can leave it empty until you are ready to start adding them later.
NOTE: All photos are added from within an album page. To add a new page, click the Back to Album button and then the Create New Page button.
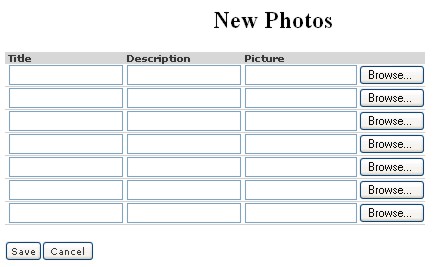
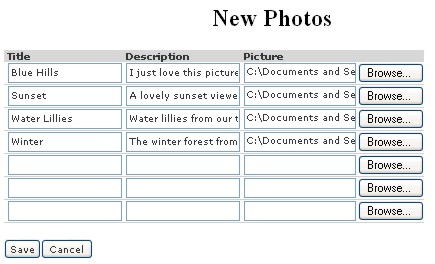
To add pictures to your album...
After clicking the New Photo button, the following page will appear:
- click a Browse button and navigate to a photo residing on your local computer.
- Add a title and description (optional).
- Repeat until you have selected seven photos, or until you have finished selecting photos to be added.
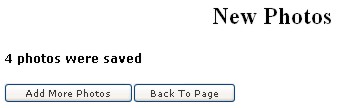
When the photos have been loaded successfully, a message like the following will appear.
Viewing and Managing Your Album
Once you have created pages and added photos, you are ready to view and manage your Photo Album.
To view your pictures...
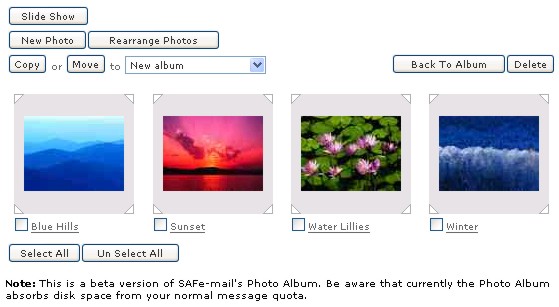
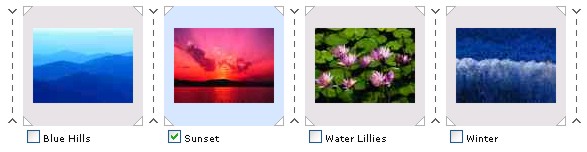
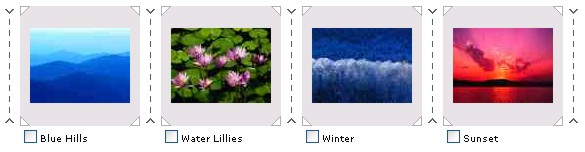
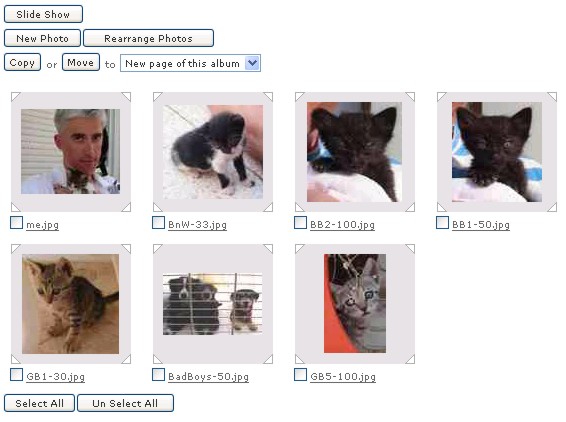
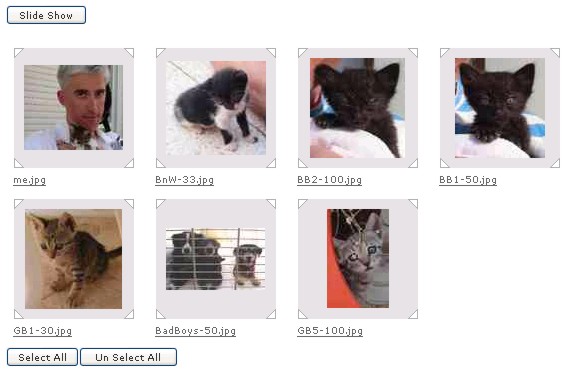
Once you have opened an album page, the your pictures will be shown in miniature, thumbnail size.
NOTE: Pictures that are smaller than this intermediate size will be displayed at their full size.
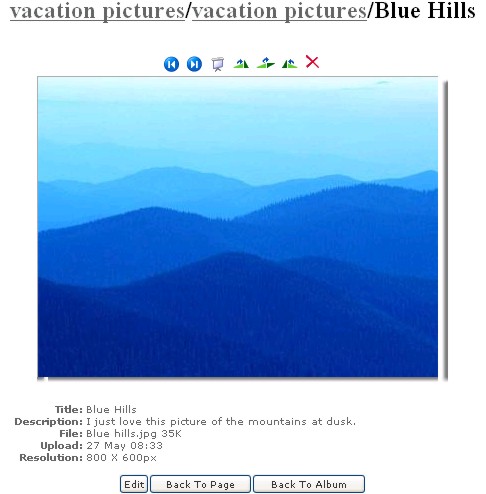
Click the picture to see it in full size in a separate window.
Your Safe-mail photo album will also present any additional information about and contained by the picture. This information would be :
Title - The name that you specified. This is the display name for the picture when viewing an album page. If no title has been specified, then the file name will be displayed.Description - Notes, description, or anything else that you want a viewer to see when they view the picture. The maximum description length is 2000 characters.
File - The name of the picture file. When downloading this picture, you will need to look for this file name on your local computer.
Upload - The date when the picture was uploaded to your album.
Date - The date when the picture was created.
Resolution - The dimensions of the picture in pixels (px). Each pixel is a dot, and pictures are constructed of dots that form an image. Generally speaking, more pixels mean a picture of higher quality.
Flash - Yes/No, indicates whether a flash was used when taking the picture.
Focal length - The distance from the optical center of the lens to the image sensor of the camera, when the lens is focused on infinity. The focal length is described in millimeters (mm) and determines the angle of view (how much of the scene can be included in the picture) and the size of objects in the image. The longer the focal length, the narrower the angle of view and the more that objects are magnified.
F number - The ratio of the focal length to the diameter of a (camera) lens system. This ratio represents the size of the aperture (a hole created by the diaphragm in the lens that allows light to reach the film when the shutter is clicked) in terms of the effective focal length of the lens. For example, 16 represents an aperture size that is one-sixteenth of the focal length. The rule is that higher the f-number, the less light is admitted through the lens.
Exposure - The amount of time the shutter is open. Very short shutter speeds are used to freeze fast-moving subjects, or when conditions are unstable. Very long shutter speeds are used in low-light conditions such as when you are indoors, or at night.
Camera - Most digital cameras record the camera name and model with the picture - in the header.
You can use the following buttons:
![]() -
See the previous picture in the album page.
-
See the previous picture in the album page.
![]() - See the next picture in the album page.
- See the next picture in the album page.
![]() - Start slide show of the pictures in the album page
- Start slide show of the pictures in the album page
![]() - Rotate the picture 90° clockwise
- Rotate the picture 90° clockwise
![]() - Rotate the picture 180° clockwise
- Rotate the picture 180° clockwise
![]() - Rotate the picture 90° counter clockwise
- Rotate the picture 90° counter clockwise
![]() -
Permanently delete the picture
-
Permanently delete the picture
![]()
Edit - Click edit to change the Title and Description of the picture
Back To Page - Close the image and return to the thumbnail images of the album page.
Back To Album - Close the album page and open the page list.
Album Page Buttons

Slide Show - Show the contents of the Album page in a slide show.
New Photo - Opens dialog for uploading pictures from your local computer.
Rearrange Photos - Opens dialog for changing the order in which the pictures are displayed
Copy - Copy selected pictures to other albums or
pages.
NOTE: Copy does not duplicate pictures. Copied pictures are virtual
pictures linked to the original picture. This means that any changes made to the
picture are reflected in all of the copies.
Move - Moves selected pictures to other albums or pages
Back To Album - Returns the user to the page list of the Album
Delete - Permanently deletes selected pictures. NOTE: Deleted pictures are NOT sent to the trash. This means that deleted pictures are not recoverable.
![]()
Select All - Select all the pictures currently viewable in the album page.
Unselect All - Unselect one or more pictures that were selected in the album page.
Click the Slide Show icon (![]() or
or ![]() ) run a slide show of the pictures contained in the
open page of the album.
) run a slide show of the pictures contained in the
open page of the album.

Click the stop button ( ![]() )
to halt the slide show. Use the faster-slower buttons (
)
to halt the slide show. Use the faster-slower buttons ( ![]() )
to modify the speed of the slide show. The text box to the left of the buttons
indicates the number of seconds between each picture (
)
to modify the speed of the slide show. The text box to the left of the buttons
indicates the number of seconds between each picture ( ![]() ).
).
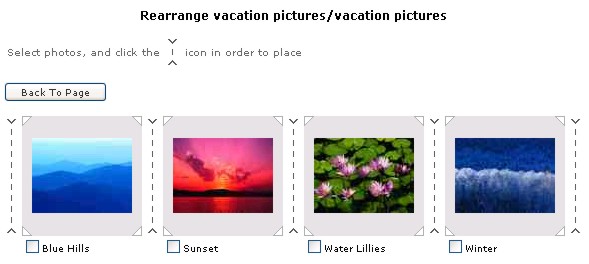
To change the order in which the pictures on a page are viewed...
By clicking the Edit button (![]() ),
you can set a photo as the album cover photo, or the title photo for the page.
You can also change the title and add to the description.
),
you can set a photo as the album cover photo, or the title photo for the page.
You can also change the title and add to the description.
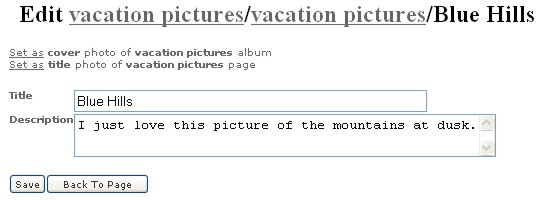
NOTE: Each description has a capacity limit of two thousand characters (2k).
When you are finished making your edits, click Save.
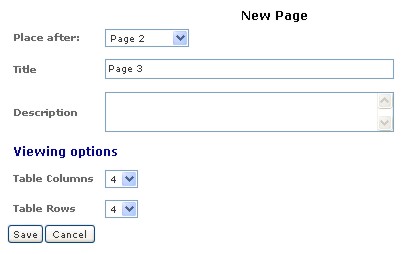
By clicking the 'Edit page details' link, you can change the page Title, Description, and Viewing Options.
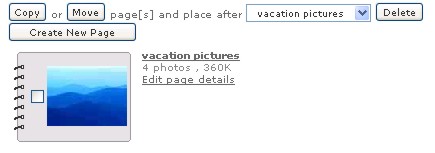
After clicking 'Edit page details', the Page Edit screen appears.
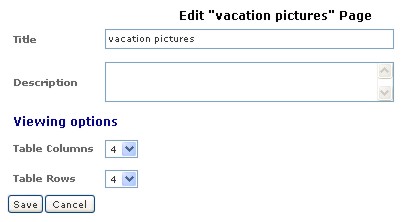
When you have finished making changes to the page details, click Save. You will return to the page list for the album.
Safe-mail allows you to share your pictures with family, friends, and colleagues who are also Safe-mail users.
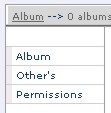
Permissions
In Permissions, you select those Safe-mail users that you wish to be able to view your album, as well as those Safe-mail users that you want to be able to make changes to your album.
NOTE: By selecting the following checkbox, the permissions that you set will be for all current albums, and any future albums that you create.
![]()
Otherwise, you will need to give new permissions for any new album that you create.
View Only
View Only permissions are for those users that should ONLY view your photo album. For those users that need to also to be able to modify the album, use the View and Save permissions.
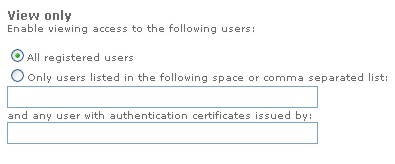
For those users that should ONLY be able to view your photos, you have the following option:
NOTE: If you have many Safe-mail account names to add, we recommend that you prepare the list in a text editor such as notepad and copy and paste the text into the text box.
View and Save
View and Save permissions are identical to View permissions, except that users that have been given View and Save permissions are able to modify your Album as if it was their own. This means that you should be careful when deciding who to give these permissions to.
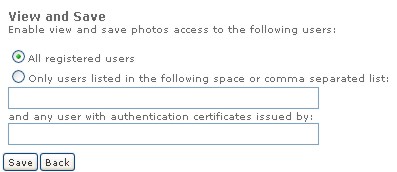
NOTE: If you have many Safe-mail account names to add, we recommend that you prepare the list in a text editor such as notepad and copy and paste the text into the text box.
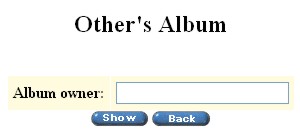
Viewing/Editing Another User's Shared Album
To view and/or edit a shared album owned by another user...
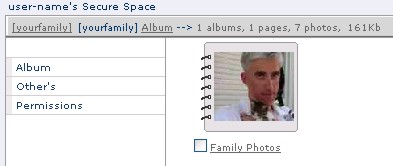
The shared album will open to the Album page. In the example below, the user 'yourfamily' gave 'user-name' permission to 'View and Save'. After typing yourfamily in the Album owner text box, as described above, yourfamily's album opens.
In the above example, 'yourfamily' gave 'user-name' View and Save permissions, which means that user-name has access to the album as if the album was user-name's own album.
However, yourfamily later decided to restrict user-name's access and gave him View permissions. As a result accessing the album pages look like the following:
Notice that there are only three buttons available to user-name.