Calendar Features
The
Calendar/Event Planner
Quick Access To Events
Tasks
Search
Settings
The Calendar/Event
Planner
With the Calendar, you can schedule events for
yourself and for others. With just a few clicks of a mouse, you can bring colleagues
together for meetings and events that help to fulfill the goals of your
organization. The Calendar can also be used to help manage the progress of
projects, organize social functions, and promote corporate activities.
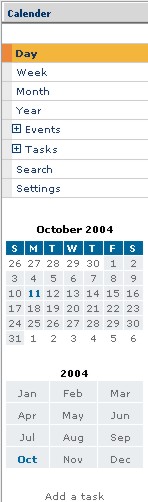
Elements of the Calendar Feature
When you open Calendar for the first time, you
will be shown the current day's schedule of events.
Use the navigation bar to the left to navigate
through your schedule. The above figure is an example of day schedule.
Calendar Views
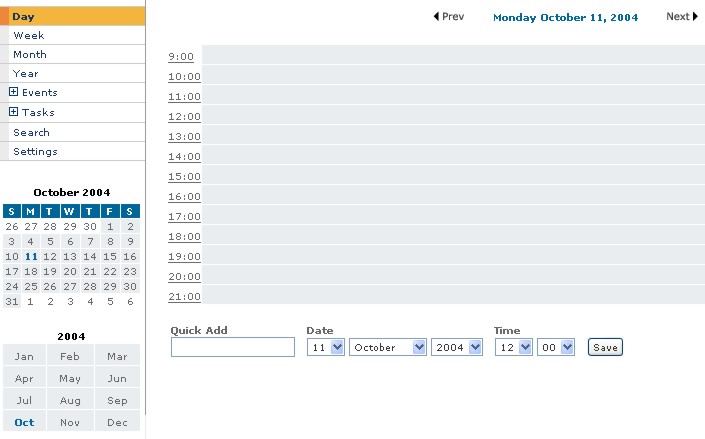
Day
When you click a day in your calendar, or when
you open your calendar, the calendar opens in Day mode.
To see the details of a schedule, click the event
name.
NOTE: Clicking
the time next to an event will open a new event window, prompting you for a
new schedule. Calendar allows you to
schedule more than one event at a time.
Week
When viewing the schedule for a day, you can see
the schedule for the week by clicking 'Week' in the navigation bar, to the left.

To open the schedule for a specific day, click
either the day name, or the date.
To schedule an event, click [Add]. The 'Add
Event' window will open. The 'Add Event' window will always open with the
date set for the day in which you opened the window.
NOTE:
From the 'Add Event' window, you can schedule an event for any time or day,
and not just within the time frame in which you opened the 'Add Event' window.
Month
Like the Week view, you can view a day's schedule
by clicking the date. To open the 'Add Event' page, click the [Add] link.
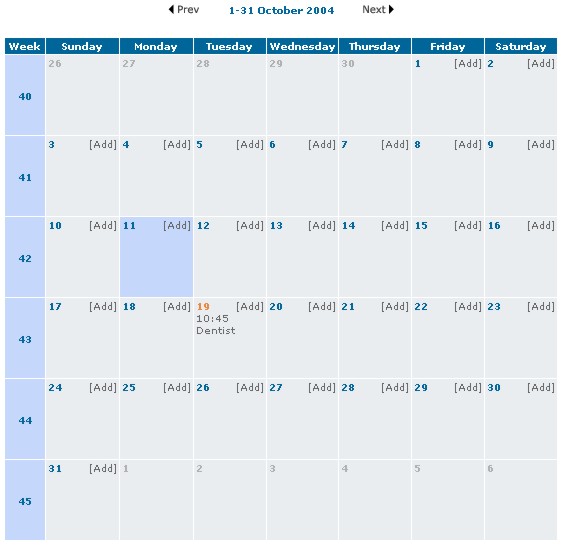
To view the schedule for a specific week, click the week value
on the left of the Month view. For instance, to see the schedule for the week of
October 3-9, click the '41' in the blue Week column on the left.
Year
When the Year view is open, clicking a day value will open the window for the
schedule of that day. Clicking a Month name will open the schedule for that
month.
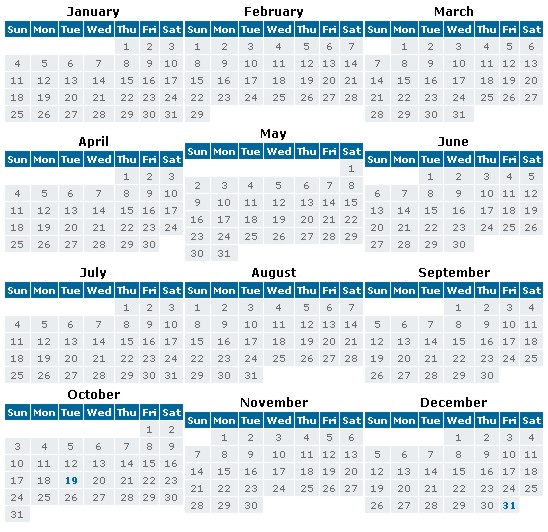
Those dates that contain a scheduled event will
be shown in bold.
Back to the Top
Quick Access To Events
You can quickly and easily edit and manage existing
events by clicking 'Events' in the navigation column to the left.
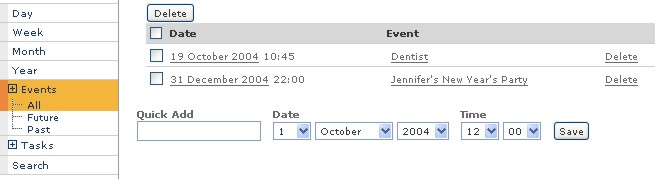
From the Events window, you can change the date,
add details, make invitations, and delete the calendar event.
Back to the Top
Tasks
The tasks feature allows you to keep track of
assignments and projects.

It also allows you to prioritize, manage status,
and set the start and due dates for each task.

Back to the Top
Search
Use the search function to find any calendar
event, or task entry containing the search term(s).
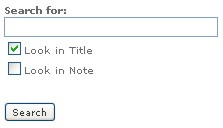
By choosing either the 'Look in Title' and/or
'Look in Note', you can limit or expand how the search function acts.
Back to the Top
Settings
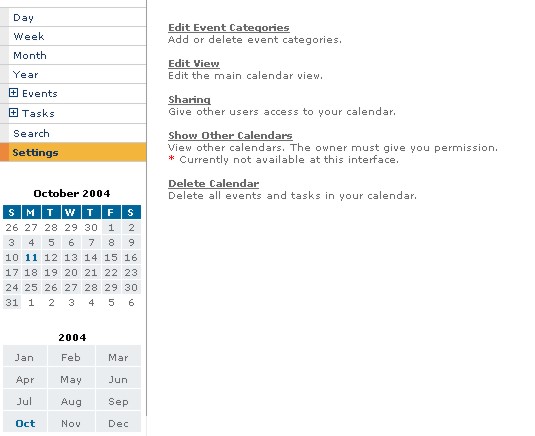
The Calendar Settings allows you to change
Calendar options. You have five possible changes that you can make:
-
Edit Event
Categories
-
Edit View
-
Sharing
-
Show Other
Calendars
-
Delete Calendar
Edit Event Categories
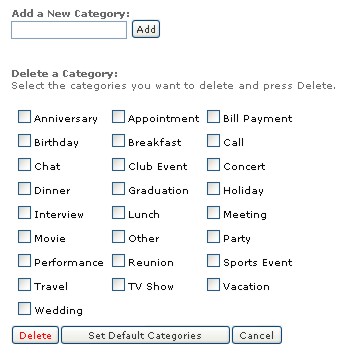
When specifying an event, you have the option of
choosing an event category. To expand or modify the category list, go to the
Edit Event Categories page (above).
To add a new category, type a category
name in the text box underneath 'Add a New Category' and click Add.
The Edit Event Categories list will refresh, with the new category item inserted
in the right place alphabetically.
To deleted a category, select the check
boxes of one or more event categories, and click the Delete button.
The Edit Event Categories list will refresh, with the selected categories
removed.
To leave the Edit Event Categories page
and return to the Calendar Settings page, click the Cancel button.
NOTE:
Clicking Cancel will not remove changes that you have made.
Back to the Top
Edit View
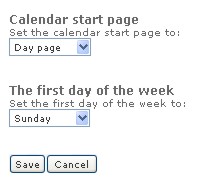
Calendar Start Page - When you open the
Calendar, the start page will always be the 'day page'. To change the default to
one of the following:
-
Day
-
Week
-
Month
-
Year
- Task Page
Choose an appropriate selection from the Calendar
start page selection box.
The First day of the week - Depending on
where you are in the world, the first day of the week can be different than the
default, which is Sunday. To change the first day of the week to a different
day, select a day from the selection box.
Save/Cancel - To apply the changes that
you made above, click the Save button. To discard all of the changes that you
made in this session click the cancel button.
Back to the Top
Sharing
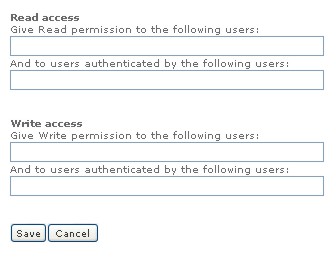
If you want other Safe-mail users to be able to
read, or even change, your calendar, type the appropriate addresses in the
appropriate address box and click Save.
Back to the Top
Show Other Calendars

If another Safe-mail user has given you
permission to view or modify their calendar, you can view their calendar by
typing their user name. It is not necessary to write their full email address in
the box. For instance, for 'bob@safe-mail.net', you only need to use 'bob'.
NOTE:
This option doesn't work from within the Modern interface. You will need to
switch to another interface to view another user's calendar
Back to the Top
Delete Calendar
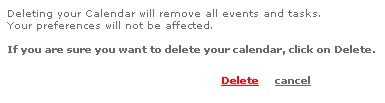
Before deleting a calendar, remember that there
is no way to recover deleted calendar information once you have deleted the
calendar.
Back to the Top
Creating a Calendar Entry
The Calendar keeps track of your busy schedule,
and provides
a way to synchronize the efforts of you and your colleagues.
There are two ways to create a calendar entry, the
standard way and Quick
Add.
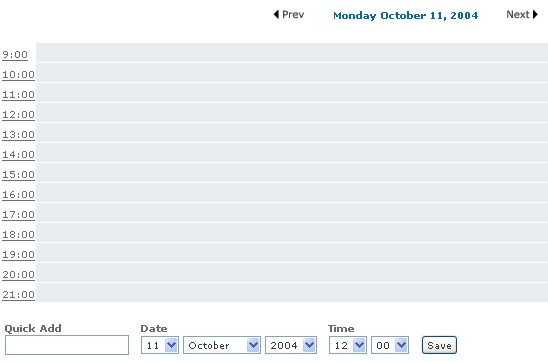
Quick Add
To create a calendar entry via Quick Add...
-
Creating a calendar entry via Quick Add is simple.
-
Open your calendar.
Your calendar will open to the current date.
-
Go to the bottom of the page, where you will see the Quick Add entry boxes.

-
In the first text box, type the name of the calendar entry. Next, select the
date of the entry, and then the time of the event.
- Once you have added these details, click the Save button.
The calendar entry will appear on the indicated day and time. The event will
be recorded as lasting for an hour. If you need to be able to issue invitations,
specify a longer/shorter duration, indicate Event Type, give a location, etc.
you will need to create a calendar entry using the standard calendar method.
The Standard Method for Calendar Entry
The normal calendar entry allows you to set the:
- Date
- Time
- How long the event will last
- Name of the event
- Type of event
- Location of the event
- Personal notes
- Space for making invitations
- Set repeatability - length of time to repeat calendar entry
To create a calendar entry...
-
From the Tools menu, select Calendar.
The Calendar opens to the current day's schedule.
-
In the schedule view, click one of the time designations, to the left.
A schedule window opens.
-
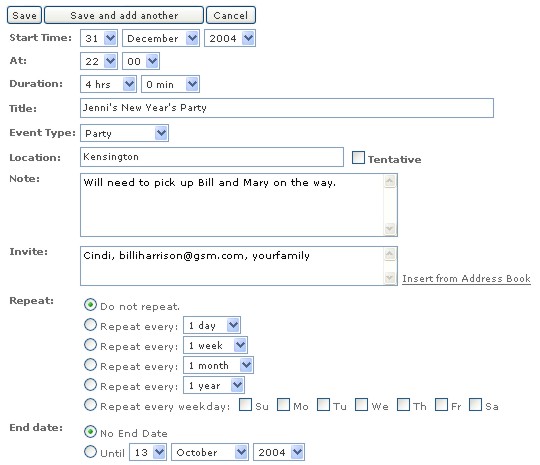
Set the:
Start Time - the default will be today, at the hour you selected on the left
hand side. Change it to the required day, if necessary
At - change the time to reflect the starting time of the event. You will not
need to set the ending time. When you set the duration, the ending time will
automatically be calculated.
Duration - set the length of time for the event. You will only be able to set
the duration in fifteen minute increments.
Title - The title of the party will appear in all of the invitations, so the
title should be descriptive of the event.
Event Type - by default, the Event Type will be 'Anniversary'. You have 25
other event types to chose from , including 'Other'.
Location - let everyone know where the event is taking place.
Tentative - if the key participants in the event have not confirmed their
intention to take part, or if the time frame is uncertain, indicate this by
selecting 'Tentative'.
Note - a comment for yourself. Anything that you need to know, do, etc. in
preparation for the event.
Invite - send an invitation to additional participants. For those invitees
that are in your addressbook, or are Safe-mail users, it is sufficient to use a
nickname from your address book, or the Safe-mail username (e.g., bob23 from bob23@safe-mail.net).
Click 'Insert from Address Book' to open your address book to select entries
from your address book for inclusion in your invitation.
NOTE: Invitations are sent out as email
messages. When invitations are sent, the subject will be the event title. The
body of the message will contain the start and end time, as well as the
location.
Repeat - You can have the event repeat
every 1-6 days, 1-4 weeks, 1-6 months, or 1-3 years.
End date - You can tell the Calendar to
stop repeating an event by specifying a date at the 'End Date'.
- When you are finished setting up the calendar,
click the Save button, or the 'Save and add another' button.
If you have made one or more invitations, you
will be asked if you want to go ahead and send the invitations to the addresses
that you specified. The invitation confirmation will look like the following:
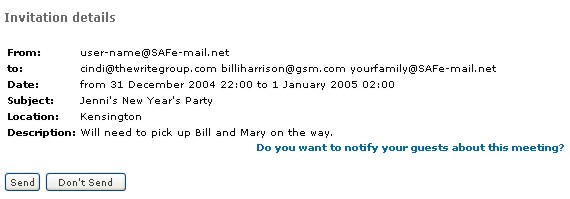
- Click Send, you will return to the
window that you started with, and see the following message at the top of the
window:

Depending on the calendar interface, (Day, Week,
Month, Year) you will see the scheduled event like this:

To view, edit, and/or delete an event, click on
the event title.
If you are in the daily screen, you can delete
the event by clicking the [delete] link.
Back to the Top
Adding to Your Task List
The tasks feature allows you to keep track of
assignments and projects - as well as allowing you to prioritize, manage status,
and set the start and due dates for each task.
To add to your task list...
-
In the Navigation
menu to the left, click Tasks or click the link 'Add a Task' at the left.
A list of existing tasks will appear. If no tasks have been created, you
will see a New Task button.
-
Click the New Task
button, the Add New Task window will appear.
-
Click the Save
button.
The task list window will appear.
Back to the Top